
I love using everyday items in the garden.
Bowling Balls are a great example of that philosophy.
Since large balls or orbs are hard to find and expensive,
you can use these to cap off pillars
or as a ring of pearls around your gardens.
 |
| Spray painted bowling balls for use in garden decor |
I chose silver spray paint and repaint them
every year or so to keep them shiny.
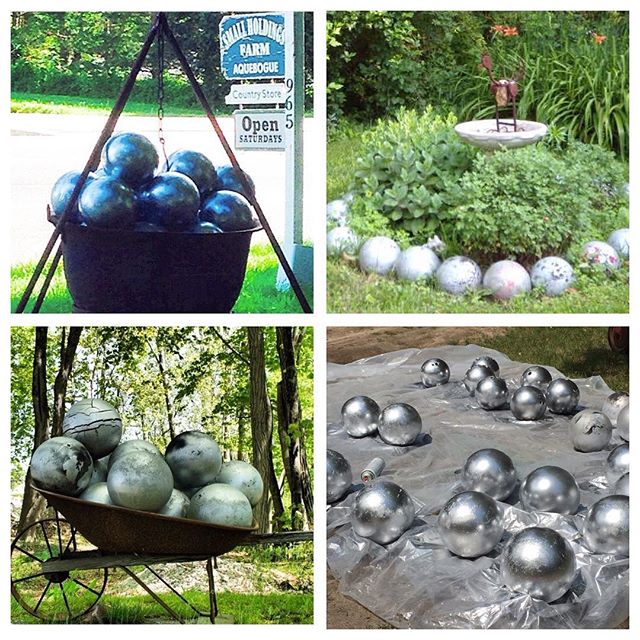 |
| Some ideas for bowling balls in garden decor |
If this is something you would like to do,
my only tip would be to make sure you keep
the finger holes down so they don't fill with water
and freeze. If that happens it will crack the balls.


